 "File" Menu
The "File" menu contains two options for recording the plot area,
"Print..." and "Screen Grab..." The Print option switches to
a PostScript or GIF device and redraws everything.

In the "Print" window, there are three output options:
- Printer - Writes to pgplot.ps and uses the entered "Print Command:"
to send it to the printer
- PS File - Writes to PostScript file entered in "PS File:" field"
(Default: pgplot.ps)
- GIF File - Writes to GIF file entered in "GIF File:" field"
(Default: pgplot.gif)
The orientation of the output file defaults to "Landscape" as
this matches the aspect ratio of the plot area. The
"Portrait" orientation inverts the width and height of the plot area.
Combining the "Portrait" mode with multiple viewports may cause
unwanted spacing to appear between the viewports.
By default the output file is drawn using "Color" as the plot area
of the /xtk device is in color, however, when printing to paper
white on black color tables are not optimal. Clicking on the
"Greyscale" option switches to the invgray color table,
and temporarily changes the /xtk device to that color table for
a preview.
Press the "Print" button to initiate writing to a file and
printing, if applicable. Note: the /xtk device will not
be able to update until the operation is complete. To exit
the "Print" window without doing anything, press "Cancel"
If, however, all data is not available for items in the
plotted area, the "Print..." option will be unable to reproduce
the plot as it appears. In this case, the "Screen Grab..."
option is recommended.

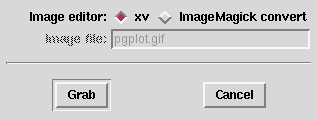
There are two methods for performing the screen grab, "xv" and
"ImageMagick convert". The default, "xv", raises the /xtk device
and uses xv to crop the plot area. You must save the image from
xv or it will be lost.
- Right-click the cropped image
- From "xv controls" click the "Save" button
- Enter the file name in the "Save file:" field (e.g. pgplot.gif)
- Press "OK"
The uncropped grab, pgplot.xwd, will remain in your directory unless
removed manually.
The "ImageMagick convert" method requires ImageMagick to be installed,
however, it is much more automatic than the "xv" method. When this
method is selected the "Image file:" field becomes available for
editing. The filename entered in this field, which is pgplot.gif
by default, determines the type of the converted file by its extension.
GIFs are recommended. The uncropped grab, pgplot.xwd, is deleted
automatically after the output file is written.
The "File" menu also contains a "Close" option which closes the /xtk
device. This is equivalent to using the close_pg_window command.
 "Edit" Menu
The "Edit" menu contains quick access to a couple commonly used
ximage commands, grid, which overlays a grid of sky coordinates
on the image, and scale, which plots a legend representing the
values assigned to each color in the image.

The difference is that "Show Grid" and "Show Scale" are checkboxes which
allow these annotations to the plots to be turned on and off
without redisplaying the image.
 "Help" Menu
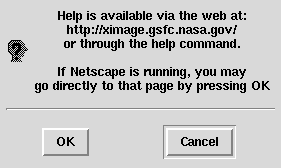
Selecting "Ximage" from the "Help" menu is a simple way to connect
to the latest online help for ximage, provided Netscape is running.

Click "OK" to send a current Netscape browser to the main ximage
page. Selecting "Cancel" will close the window with no effect.


Please send reports of errors to :
xanprob@athena.gsfc.nasa.gov
HEASARC Home |
Observatories |
Archive |
Calibration |
Software |
Tools |
Students/Teachers/Public
Last modified: Wednesday, 29-Mar-2006 14:44:33 EST